

Ford Transit conversion planning
Ford Transit window buying guide
Choose glass for the full-size Transit by body generation, length and panel position. Build a shortlist around your seating, kitchen and bed, then check door arrangements and the exact product restrictions before ordering.
Shop full-size Transit windows
Identify the Transit and each pane
Five checks for your Transit window shortlist
A model name or wheelbase alone does not identify the right glass. Record the full-size Transit body, physical side and exact panel for each pane in your conversion.
Full-size Transit body and generation
Use the full-size Transit range, not Transit Custom or Connect. Check the body against the product photographs, especially around a model change. The category and product year labels differ, so confirm boundary-year vans individually.
Length and exact panel position
Record L2, L3 or L4 where known, then mark front side, sliding door, middle panel, rear quarter and rear door separately. The linked passenger middle pane is L3/L4 only; a front-side fit does not establish middle or rear fitment.
Single or twin sliding doors
Identify whether the driver-side panel is a fixed body panel or another sliding door. The linked driver-side slider excludes twin-sliding-door vans and SWB models. Photograph the physical panel if its position is unclear.
Rear glass and supplied quantity
Specify the actual rear-door positions and any existing heated glass, wiper or other features. The linked barn-door listing uses Window Set in its title but x1 in its description. Confirm the supplied panes before calculating the order.
Interior layout and fitting materials
Mark seating, kitchen, bed and storage on a simple sketch. Decide where daylight, a reachable opening and night screening will be useful. Confirm glass, trim and bonding materials together against the exact product and adhesive instructions.
Find your fit
Transit glass examples with specific fitment checks
Use these products to understand panel and length restrictions. They are examples, not a tested complete conversion kit. Confirm quantities and compatibility before ordering.
Front-side opening and middle-panel glass
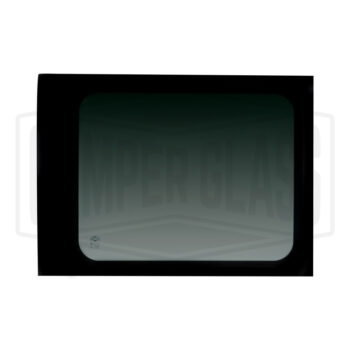
Rear-door glass: confirm supplied quantity

Transit buying questions
Body, length and panel choices explained
How do I choose windows for a full-size Transit rather than Transit Custom?
Start by identifying the actual van body. Camper Glass keeps the full-size Transit and Transit Custom in separate ranges, and a shared Ford badge does not make their glass interchangeable. Transit Connect is another vehicle and should not be matched to a full-size Transit pane.
Use the full-size Transit catalogue, then check the exact listing, physical side and panel position. The checked products use 2014 onwards or current-year wording, while the category heading uses 14-25. For a van around a model change or a later year, send photographs and the product link for confirmation instead of relying on the year label alone.
Make a separate shopping-list entry for every pane. Front-side, sliding-door, middle, rear-quarter and rear-door products need individual checks. Include the body, length designation and door arrangement with each enquiry.
Does the same Transit side window fit L2, L3 and L4 vans?
Some front-side products list MWB, LWB and XLWB, expressed as L2, L3 and L4 in their compatibility text. That does not establish the coverage of every side panel. The passenger middle-section fixed pane is specifically LWB/XLWB, L3/L4 only.
Record the exact panel on a side-view photograph or sketch. A middle-section pane is different from a rear-quarter pane, and a glass outline that looks similar in a search result is insufficient confirmation. Check the physical driver or passenger side against the actual van rather than relying on how a photograph is oriented.
For a longer conversion, consider how the pane aligns with the bed, kitchen and storage. A window behind a tall cabinet may contribute little useful light or view. Choose the position for the layout, then identify the compatible product for that position.
Can I use the driver-side slider on a twin-sliding-door Transit?
The checked driver-side sliding window explicitly excludes twin-sliding-door models and short-wheelbase vans. Its driver-side position should not be treated as approval for a glass pane fitted into a second sliding door.
Confirm whether the intended panel is part of the fixed body or a moving door. If the van has two sliding doors, send photographs of both sides and ask the team for the correct glass before ordering. Do not substitute a front-side pane simply because it has an opening section.
Once fitment is confirmed, think about access from the seat or bed and how furniture or blinds will affect the opening. Use the shared window buying guide for fixed-versus-opening and privacy advice, alongside these Transit-specific checks.
What should I check before ordering Transit rear-door glass?
Identify each rear-door position, the actual body and any features you need to retain, such as a wiper or heated glass. Aftermarket privacy glass should not be assumed to reproduce all the features of an existing factory pane.
The linked Transit barn-door listing uses Window Set in its title but says x1 in its description. Confirm the supplied pane quantity and sides with Camper Glass before ordering or calculating fitting materials. The checked compatibility text lists MWB/LWB/XLWB, L2/L3/L4, but that does not resolve the quantity wording.
Count actual panes, not shopping-cart line items. Also distinguish a rear-quarter side window from a window in a rear door. Send a photograph of the intended position and a link to the exact product if the description leaves a question unanswered.
Which panes make sense for a Transit camper conversion?
Begin with what each position will do for the people inside. A seating area may benefit from daylight and an opening within reach; a bed may benefit from a useful view; tall storage may make glazing at another position less valuable. These are layout decisions, not a universal recommended package.
Sketch the furniture and mark each candidate pane before choosing fixed or opening glass. Check how curtains or blinds will sit and whether an opening remains reachable after the conversion is furnished. Privacy glass does not replace night-time screening when the interior is illuminated.
For rear-quarter glass, check the exact length and position on its own product page. Do not infer fitment from the linked front slider or middle-section pane. Use the main buying guide for general style comparisons and the live Transit range for current products, availability and prices.
How should I plan adhesive, trim and fitting for Transit glass?
The checked Transit products sell fitting kits separately and recommend a double fitting kit per large pane. Confirm the materials and quantities for the actual glass order with the team, especially while the rear-door product quantity needs clarification. A set or pair is not necessarily one pane.
Check the correct trim for the aperture and panel position. Products shown as related accessories are prompts to investigate, not proof that every accessory fits every pane. Follow the glass and bonding-system instructions for preparation, temperature, curing and when the van can be used.
Read the van-window fitting guide before planning work. Inspect the new glass, confirm its physical side and fitment, and resolve uncertainties before cutting or bonding. Replacing existing glass also requires assessment of the aperture and old bonding material; this guide does not confirm that a damaged opening is ready for a new pane.
Five reasons to choose Camper Glass
Your windows. Our expertise.
Research and development, first-hand experience and support beyond the sale.
Know who you’re buying from
The Camper Glass difference
- Developed by us. Understood by us.
- We invest in R&D and production tooling, so we understand how our windows are designed, made and fitted.
- 5-year window warranty
- Backed by a team that knows our windows.Subject to window warranty terms.
- Choice, backed by expertise
- A wide vehicle range and direct automotive manufacturer relationships.Check product-specific compatibility.
- A team you can talk to
- Showroom visits and fitting support, before and after purchase.Check opening hours before visiting.
- Our Price Promise
- Bring us a lower UK price for the same product before ordering.Subject to Price Promise terms.
Find the right windows, with the right support.
Find windows for my vanMore than a pane of glass
Why choose us over a competitor?
A window is only part of your purchase. Choose the knowledge and support behind it, too.
- Know what sits behind the glass
- The development work and first-hand knowledge matter, not just how a window looks.
- More than a warranty headline
- You need to know who will help if a question or issue arises.
- Avoid the wrong fit
- Your vehicle, generation and panel position all matter to the choice.
- Don’t leave support to chance
- Questions can arise during fitting. A real team and showroom give you somewhere to turn.
- Keep value and support together
- Bring a competing price to us before ordering. We’ll check it against our Price Promise terms.
Our team can help you choose. Please confirm vehicle compatibility and read the relevant product and warranty terms before ordering.
Plan the glass around the layout
Three practical Transit conversion examples
An L2 day van with a useful seating area
Map the seating and sliding-door access first. Choose front-side glass that brings daylight to the occupied area and consider whether an opening will remain reachable after lining and furniture are fitted. The driver-side slider example lists L2/L3/L4 but excludes twin sliding doors, so verify the door arrangement as well as the length.
An L3 camper with a kitchen and rear bed
Mark the kitchen units, bed height and tall storage on a side-view sketch. The passenger middle-section example lists L3/L4 and may be a product to investigate for that precise panel. A rear-quarter pane needs a separate fitment check. Avoid choosing glass for a position that will be covered by cabinetry.
An L4 conversion with rear-door glazing
Make a separate entry for each middle, rear-quarter and rear-door position. Confirm the rear-door product quantity and physical sides before planning the glass and fitting-material order. Decide where curtains or blinds are needed for night-time privacy and how each pane will be cleaned or reached once the layout is complete.
These are planning examples, not tested conversion packages. Match every pane to the exact van and use current product instructions, stock and prices for the order.
Send Camper Glass the full vehicle model, body generation, length designation and photographs of both sides and the rear doors. Identify the physical side and panel for every pane, and include the links or SKUs you are considering.
Explain where seats, the kitchen, bed and storage will sit. If replacing factory glass, describe the features that must be retained and the condition of the opening. Resolve compatibility, supplied quantities and fitting materials before ordering or cutting.
Continue planning
Buying, fitting and vehicle ranges
Use the shared guidance alongside the exact vehicle-generation and pane checks.